Show Archive
Tuesday 10th August 2021.
August 10, 2021
It is Tuesday which means it is time to catch up with Feisty Foodie Sara up North. Continuing with Indian Cuisine:
 “Well…the weeks just keep ticking on and we are continuing with our focus on Indian food…yum!
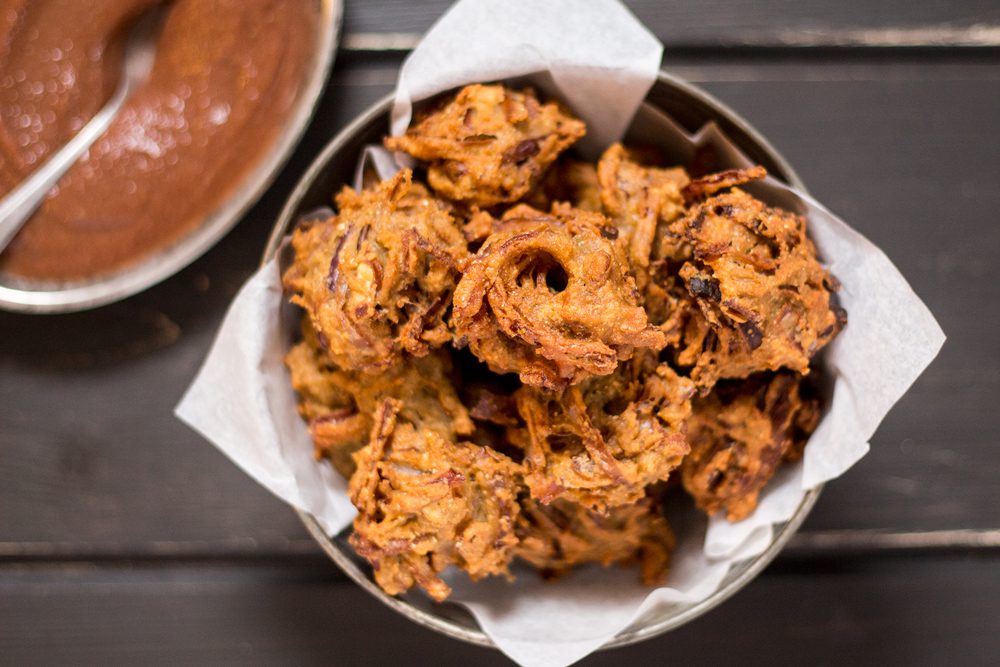
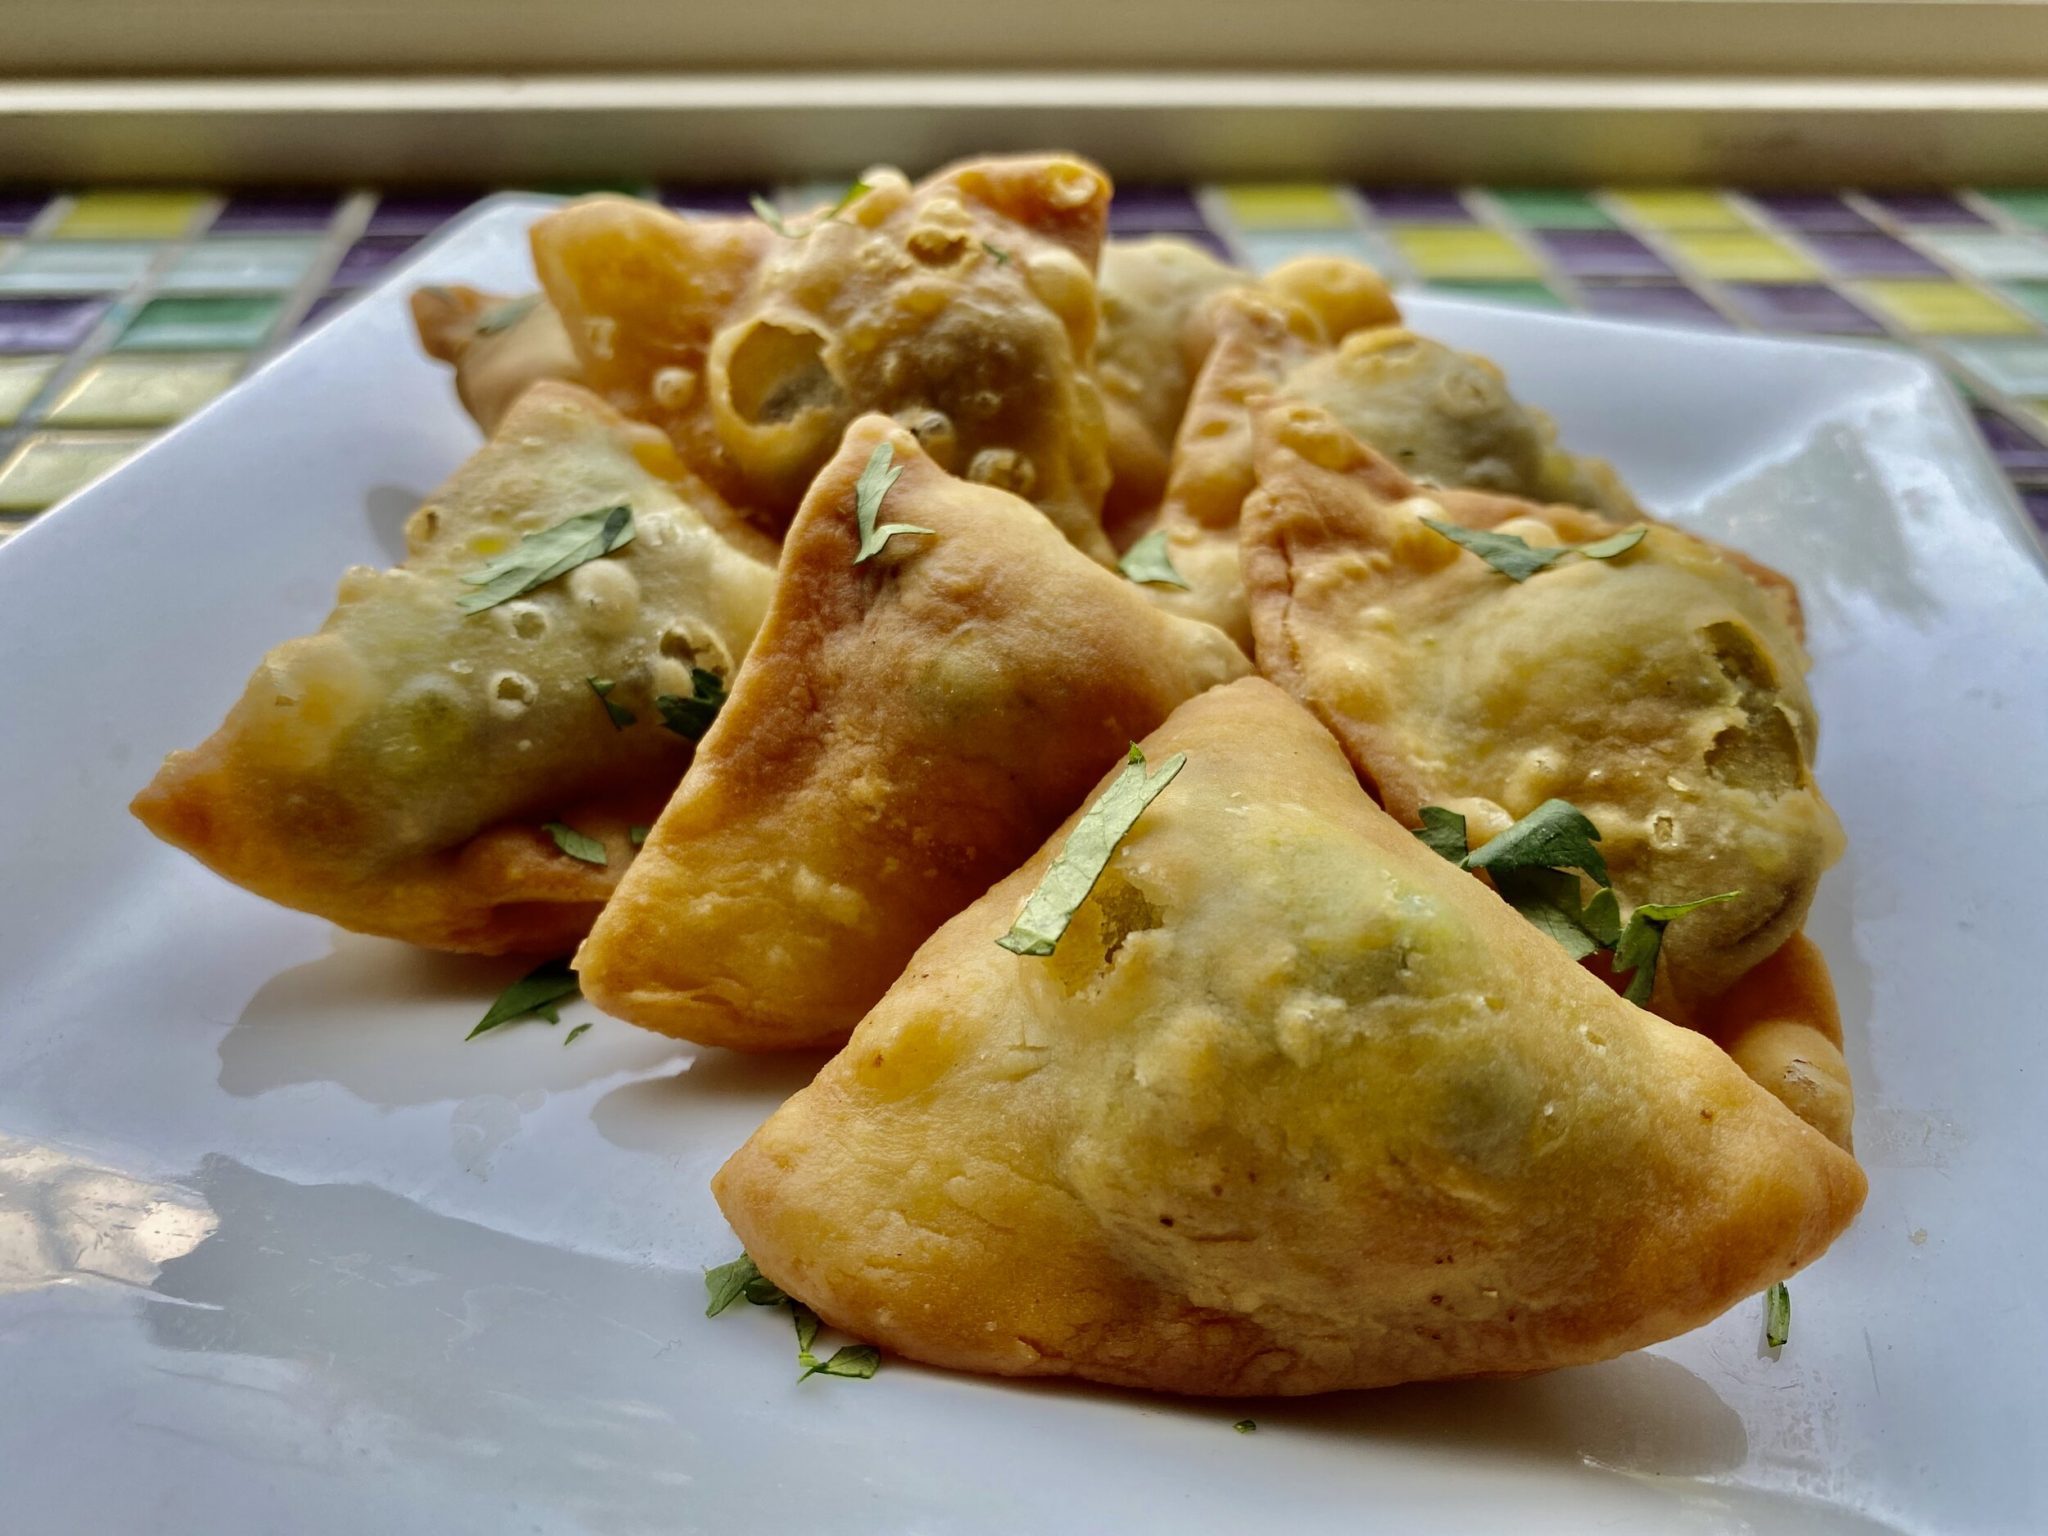
To go with our Aloo Gobi appetizer from last week, this week we’re going to try and perfect Onion Bhajis! These are another one of my favourite Indian appetizers! These onion bhajis are gluten free, keto and vegan…but don’t be fooled, they are still delicious! They are gluten free because they use chick pea flour instead of regular flour, which also gives them great flavour and texture. Plus, I did some research and found out how to cook them in the air fryer! I love to pair bhajis (or pakoras) with Tamarind Chutney and since Tamarind is easily found in Panama…you can make it from scratch! One of my other favourite appetizers (which I sometimes eat as a light main) are Vegetable Samosas! Theses ones have a more typical potato and pea filling, but you can add other vegetables, if you like. (carrots and chick peas would work too ). These can be baked or air fried and served with the same delicious chutney!
Top combine with these delicious Indian flavours, I thought we could mix up a Pineapple Mule! This refreshing cocktail with compliment the warm spices and hints of sweetness from the chutney.”
Onion Bhajis
Ingredients
2 large red onions sliced thin (0.5 cm thick)
1 cup gram flour /chickpea flour
1 tsp ground cumin
1 tsp ground coriander
1/2 tsp ground turmeric
1/2 tsp chilli powder
1/4 cup coriander leaves
Salt to taste
1 – 3 tsp water as needed
Vegetable oil for frying
Instructions
 PREPARE THE ONIONS – Peel the onion, wash and cut the onions in to thin slices. Cut them into halves again.
- MIX THE INGREDIENTS – In a mixing bowl, all all the dry ingredients – onion, flour, spices and salt. Mix them with clean hands and allow them to sit for at least 20 minutes ( or longer – up to 1 hour )
- ONION BHAJI BATTER – After 20 minutes, squeeze the onions with your hands to release the water. Combine the mixture together to form a thick batter. If you feel the batter is too dry, add 1 teaspoon of water at a time until the batter coats the onions well.
- If you feel, during the process of frying the batter has gone a bit watery, you can add 1-2 tsp of gram flour if necessary.
- FRYING THE BHAJIS – Heat Oil in a pot or deep skillet. Test oil by adding a pinch of the onion bhaji batter. If it bubbles up immediately, you know the oil is ready for frying the remaining
- Using a spoon or clean hands, add small onion bhaji batter portions into the oil and fry for 3-4 minutes. Flip the bhaji’s once they are light brown on one side and fry until they are brown all over and evenly cooked.
- Check if they’re cooked inside and the bhaji is not wet. Drain the fried fritter on a kitchen roll or absorbent paper to soak up any excess oil.
- SERVE – Serve with your favourite sauce like Tamarind Chutney!
TIP: STORE & REHEAT – Store any leftover onion bhaji’s in an airtight container and refrigerate upto 3 days. To reheat, place them on a baking tray and cook in a preheated oven at 150C for 10-15 minutes.
For the Air Fryer:
- Once you’ve got a thick batter, wet your hands and form into fairly loosely formed flat discs.
- Place the discs in the air fryer, spray with oil spray and then cook for 12 minutes at 180°C or 350°F.
- After 12 minutes increase the temperature to 200°C or 400°F
- Respray with oil and cook for a further 4 -6 minutes till your onion bhajis are golden brown in color and crispy.
Potato and Pea Vegetable Samosas
Ingredients
FOR SAMOSA DOUGH
- 2 cups all purpose flour
- 2 tablespoons oil (can be substituted with ghee)
- Pinch of baking soda
- ¾ cup water
- ¼ tsp salt
FOR SAMOSA FILLING
- 2 potatoes, medium-large size (Yukon Gold), peeled & cut in 1 inch cubes
- 2 tablespoon vegetable oil, divided
- 1 teaspoon turmeric powder
- 1 teaspoon red chili powder
- 1 teaspoon salt
- 1 cup frozen peas
- 1 teaspoon chopped cilantro, optional and for garnish
Instructions
 BOIL POTATOES: Boil potatoes for 20-25 minutes until fork inserted goes in smoothly and comes out clean.
WHILE POTATOES ARE BOILING, PREPARE SAMOSA DOUGH
Add flour, salt, baking soda, 1 tablespoon of oil to a mixing bowl and mix using a fork. Slowly add water and knead slowly into a ball. Add ¼ cup at a time, until the dough falls into a neat ball. If you have a stand mixer, you can dump all the ingredients in the mixing bowl and use the paddle attachment to get it to the right consistency.
Dab the rolled dough with a little bit of oil, and set aside for at least 15-20 minutes so the dough can rest while the potatoes are boiling.
PREPARE THE SAMOSA FILLING
Drain cooked potatoes and mash with a fork.
Add 1 tbsp oil to a skillet on med-high heat. When shimmering add the mashed potatoes, salt, pepper, turmeric, and red chili powder. Stir the spices to evenly coat the potatoes and cook for 2-3 minutes, tasting and adjusting along the way for your preference. Add peas and stir them into the mix for about 30-45 seconds. Turn off the heat and add chopped cilantro. Transfer to a bowl and set aside.
FOLDING THE SAMOSA
 Take the kneaded dough and roll it out into a long cylinder, roughly as long as your two hands side-to-side (~7-8 inches long)
- Using a knife or sharp edge, portion this cylinder into 8-9 smaller pieces. Take one of the pieces and roll into a smooth ball (while you set the others aside)
- Now, dust this ball with a bit of flour, and then using a rolling pin, roll it into a circular shape, roughly 6-7 inches in diameter (for reference, the rolled out dough should be slightly larger than the size of your hand)
- Slice this dough diagonally so you get two (roughly) semi-circular pieces. Pick up one of these pieces and lay it on your left hand so the straight edge lines up against the left side of your hand (it should look like the letter D on your hand).
- Wet the straight edge with some water and form a cone so that the top is wider and also open for you to stuff the filling. Add ~2 heaped teaspoons of filling per samosa and push it in so it evenly fills out (but only till about ¾ of the cone). You might end up adding a bit more depending on how big you rolled the dough out.
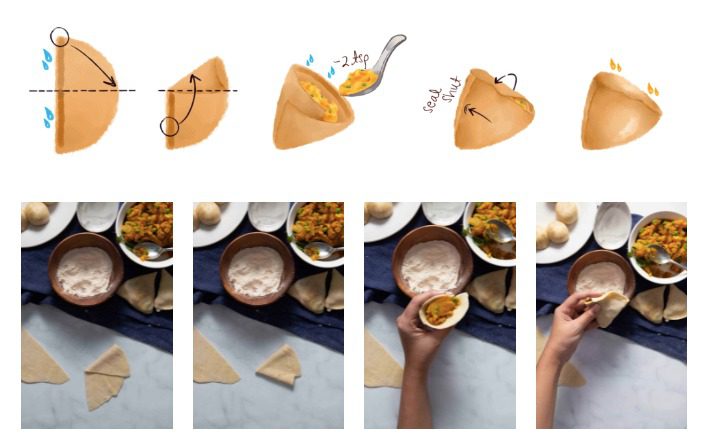
Note: Please check the post for detailed instructions on how to fold the samosas
Add a bit of water to the edge of the cone and seal it shut (either by pressing together or folding one edge over the other)
Coat with enough oil to cover all the sides and place aside. Repeat for the rest of the samosas.
OPTION 1: AIR FRYING SAMOSAS
- If you’re air-frying, after you’re done folding the first samosa, pre-heat to 425 F. Depending on the size of your air-fryer, you might need to make a couple of batches – take care not to overcrowd the samosas since that will prevent the dough from cooking properly
- Place the samosas carefully in the air fryer and cook for 10 to 12 minutes, and then flip the sides and cook for another 5 to 7 minutes. Depending on your air fryer, you might need to add a few extra minutes. When it’s done, the samosas should be crisp on the outside and a nice golden brown color on both sides.
Note: Air fryers are quite different, so the temperatures might vary. Mine takes 18 minutes total to cook. But yours might take longer or shorter depending on the size, power, etc. I suggest checking after 10 minutes to see if one side is done, and then checking again after the 5-7 minutes. You might need to add 5-10 more minutes depending on the fryer!
OPTION 2: BAKING SAMOSAS
- If you’re baking samosas, after you’re done folding the first samosa, preheat oven to 400F.
- On a sheet pan lined with a silicon liner or parchment paper, place each samosa roughly 2 inches away from each other
- Bake for 18-20 minutes and check on the color – if golden brown, flip to the other side and bake for another 10-14 minutes
- Garnish with sliced cilantro and serve with chutney or an aioli
Tamarind Chutney
Makes about 1 cup:
2 cups water
2 tablespoons tamarind concentrate
1 cup brown sugar (or jaggery sugar)
½ teaspoon Kosher salt
½ teaspoon cayenne pepper
½ teaspoon ground cumin
½ teaspoon ginger powder
Heat water over medium-high heat until just boiling. Add tamarind concentrate and stir until completely incorporated. Add sugar, salt, cayenne, cumin, and ginger. Stir until sugar and salt are completely dissolved.
Reduce heat to simmer and cook until thickened to a point that it’s slightly syrupy, about 20 minutes, stirring occasionally. Let cool for 10 minutes. Use immediately or transfer to an airtight container and store in refrigerator for up to 1 month.
Pineapple Mule
 INGREDIENTS:
2 oz vodka
2 oz pineapple juice
½ cup ginger beer
1 tbsps fresh lime juice
Fresh pineapple wedges, lime wedges and fresh mint sprigs for garnish
DIRECTIONS:
- Pour vodka, pineapple juice and lime juice in a copper mug (or highball glass) filled with ice. Top with ginger beer and gently stir to combine.
- Garnish with fresh pineapple wedges, lime wedges and/or fresh mint sprigs, if desired.